


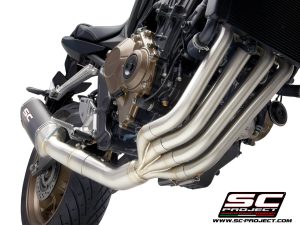
The Honda CB 650R is a striking middleweight dna-air-filter-f…cb-650-2019-2024/ naked bike, known for its sharp styling, powerful inline-four engine, and balanced performance. Many riders seek ways to enhance their motorcycle’s performance, and one effective upgrade is the air filter. Among the best options for the Honda CB 650R (2019-2024) is the DNA Air Filter, which has become popular among enthusiasts. This article explores the benefits, features, installation, and why it’s an excellent choice for improving your bike’s performance.
What is a DNA Air Filter?
DNA is a well-established brand in the motorcycle aftermarket industry. They are known for producing high-performance air filters. These filters improve airflow, throttle response, and overall engine performance. The DNA Air Filter is designed specifically to replace the stock filter in the Honda CB 650R. It offers superior filtration and increased airflow, allowing the engine to perform at its peak, whether on city streets or highways.
Key Benefits of the DNA Air Filter for Honda CB 650R (2019-2024)
-
Improved Airflow and Performance
The DNA Air Filter significantly improves airflow to the engine. Unlike the stock filter, which restricts air intake, the DNA filter allows more air into the engine. This leads to better combustion and increases horsepower and torque. Riders will notice smoother throttle response, especially at higher RPMs. This improvement is vital for aggressive riding or faster acceleration. -
Enhanced Engine Efficiency
Along with boosting power, the DNA Air Filter also optimizes engine efficiency. It ensures the engine receives the right amount of air, maintaining an ideal air-to-fuel ratio. This makes fuel combustion more efficient and can improve fuel economy, especially when cruising at steady speeds. -
Durability and Reusability
The DNA Air Filter is made from multi-layer cotton gauze, unlike the stock paper filters. This construction is much more durable. The filter is also washable and reusable, making it eco-friendly and cost-effective. A simple cleaning process ensures the filter maintains its performance for many years. -
Improved Filtration
While many performance filters prioritize airflow, DNA doesn’t compromise on filtration quality. The DNA Air Filter traps dust, dirt, and other debris while allowing high airflow. This protects the engine from harmful contaminants, ensuring long-term reliability and performance. -
Easy Installation
The DNA Air Filter is designed for simple installation. It fits directly into the stock airbox without requiring modifications. Riders with basic mechanical knowledge can install it themselves. However, professional installation is always available for those who prefer expert help.
Installation Process
-
Preparation
Start by ensuring your bike is on a stable surface and the engine is cool. You will need basic tools, such as a screwdriver and a socket wrench. -
Remove the Stock Air Filter
Open the seat and unscrew the bolts securing the airbox. Once exposed, carefully remove the stock filter. -
Install the DNA Air Filter
Place the DNA Air Filter into the airbox, ensuring it fits securely. Make sure the filter seals tightly around the edges to avoid gaps where unfiltered air could enter. -
Reassemble
After positioning the filter, reassemble the airbox. Tighten all screws and bolts securely. Finally, replace the seat, and you’re done!
Is the DNA Air Filter Worth It?
For riders seeking noticeable performance improvements, the DNA Air Filter is an excellent choice. It increases airflow, improves throttle response, and enhances engine efficiency. Additionally, its washable and reusable nature means you will save money over time.
Moreover, the DNA Air Filter works well with other aftermarket modifications, such as exhaust systems or engine tuning, allowing for even greater performance gains. If you’re looking for a long-lasting upgrade that boosts your bike’s power and efficiency, the DNA Air Filter is definitely worth considering.
Conclusion
In conclusion, the DNA Air Filter for the Honda CB 650R (2019-2024) offers a range of benefits. It improves airflow, increases power, enhances filtration, and boosts durability. It’s a simple yet effective upgrade that enhances your bike’s overall performance. Whether you’re a daily commuter or a weekend rider, the DNA Air Filter is a smart investment that will keep your bike running smoothly for years to come.


Reviews
There are no reviews yet.